XL Release - Plugin Manual
XL Release allows you to add custom task types. The custom tasks will show up in the UI and integrate seamlessly with other tasks in the release flow. You can use custom tasks to integrate with third-party components.
For example, XL Release ships with JIRA integration tasks, which are a set of custom tasks.
Custom tasks are written in the Python language.
To create a custom task, you need two things:
- The definition of the task and its properties
- The implementation of the task in a Python script
Task definition
Custom tasks reside in the ext or plugins directory of XL Release server. The ext directory is used when developing a custom task. The plugins directory is used to place bundled custom tasks that are packaged in a single zip file with extension .jar.
The ext directory contains the definitions of all its custom tasks in a file called synthetic.xml. The Python scripts are placed in subdirectories.
Here's an example of the layout of the ext directory:
synthetic.xml
jira/
   CreateIssue.py
   UpdateIssue.py
The custom task is defined in XML in synthetic.xml. As an example, here is the definition of the "Create Jira Issue" task:
<synthetic xmlns:xsi="http://www.w3.org/2001/XMLSchema-instance"
       xmlns="http://www.xebialabs.com/deployit/synthetic"
       xsi:schemaLocation="http://www.xebialabs.com/deployit/synthetic synthetic.xsd">

  <type type="jira.CreateIssue" extends="xlrelease.PythonScript">
    <property name="jiraURL"     category="input" label="Jira URL"/>
    <property name="username"    category="input"/>
    <property name="password"    category="input" kind="string" password="true" />
    <property name="project"     category="input"/>
    <property name="title"       category="input"/>
    <property name="description" category="input" size="large" />
    <property name="issueType"   category="input" default="Task"/>

    <property name="issueId"     category="output"/>
  </type>

</synthetic>
The <synthetic> element is the root node and contains the XML grammar definitions and should not be changed. (Deployit users: this is the same definition language that is used to extend Deployit).
Inside <synthetic>, we find the <type> element, which will define the custom task. The type attribute defines the name of the custom task and is always of the form prefix.TaskName. The prefix is the category of the task, for example 'jira', and the task name is a descriptive name of the task, in this case 'CreateIssue'. The prefix should be in lower case and the task name in 'CamelCase'. the attribute extends="xlrelease.PythonScript" defines this type as a custom task for XL Release. You should not change it.
Next are the properties. They are defined as nested <property> elements. The following attributes can be set on each property:
name-- the name of the property, which is also the variable name by which it is referred in the Python script.category-- There are two supported categories in XL Release:inputandoutput. Input parameters are shown in the task in the XL Release UI and need to be specified before the task starts. They are then passed to the Python script. Output variables can be set in the Python script. When the script completes, they can be copied into release variables in XL Release.label-- the label used in the XL Release UI. If not present, XL Release will attempt to make a readable version of the property name. For example, the "issueType" property will be displayed as "Issue Type" in the UI. The label attribute is used to override this behavior.description-- a help text explaining the property in more detail, to be displayed in the UI.kind-- The property type, eitherstring,intorboolean. If omitted, this attribute defaults tostring.password-- by setting this attribute totrue, the property is treated as password field. The contents of a password are obscured in the UI and encrypted in network traffic and storage.size-- Indicates how much space the UI gives to the property. Supported levels:default,small,mediumandlarge.default-- The default value of the property.
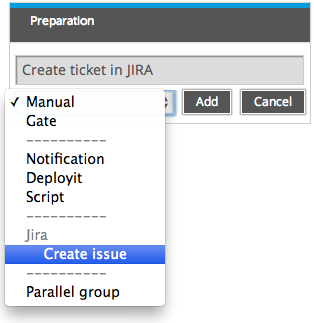
After saving the synthetic.xml file and restarting the XL Release server, the custom task will be available in the UI and can be the added to the release flow editor like any other task.

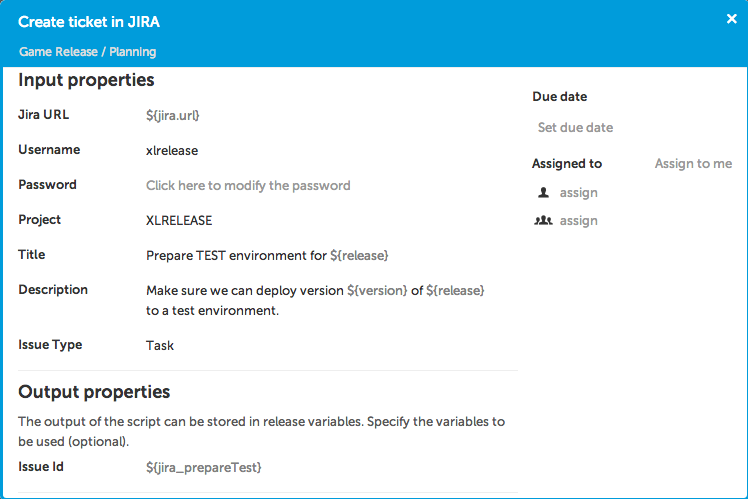
This is how the above task definition looks like in the task details popup:

Python scripts
When the custom task becomes active, it will trigger the Python script that is associated with it. Scripts should be written in the Jython dialect of Python, which is version 2.6 of Python running in the Java VM, with full access to the Java 7 API.
Scripts should be stored in a directory that has the same name as the prefix of the task type definition. The script file name has the same name as the name of the task, followed by the .py extension. So the jira.CreateIssue task looks for its Python script in jira/CreatePython.py.
Input properties are available as variables in the Python script. Output values can be set by assigning a value to their corresponding variables in the script. After execution, the script variables are copied into the release variables that were specified on the task in the UI.
For example, here is a possible implementation of the jira.CreateIssue task in Python:
    import httplib, base64, sys, string
    import com.xhaus.jyson.JysonCodec as json

    ISSUE_CREATED_STATUS = 201

    content = """
    {
        "fields": {
           "project":
           {
              "key": "%s"
           },
           "summary": "%s",
           "description": "%s",
           "issuetype": {
              "name": "%s"
           }
       }
    }
    """ % (project, title, description, string.capwords(issueType))

    credentials = base64.b64encode(username + ':' + password)

    if jiraURL.startswith('https://'):
        jira = httplib.HTTPSConnection(jiraURL[8:])
    elif jiraURL.startswith('http://'):
        jira = httplib.HTTPConnection(jiraURL[7:])
    else:
        jira = httplib.HTTPConnection(jiraURL)

    jira.request('POST', '/rest/api/2/issue', content, {'Authorization': 'Basic ' + credentials, 'Content-Type': 'application/json'})
    response = jira.getresponse()

    if response.status == ISSUE_CREATED_STATUS:
        data = json.loads(response.read())
        issueId = data.get('key')
        print "Created %s in JIRA at %s." % (issueId, jiraURL)
    else:
        print "Failed to create issue in JIRA at %s." % jiraURL
        print "Status: %s" % response.status
        print "Reason: %s" % response.reason
        print "Raw error:"
        print response.read()
        sys.exit(1)
Further customization
The following properties may be added to the <type> element to further customize your task:
<type type="myplugin.MyTask" extends="xlrelease.PythonScript">
    <property name="scriptLocation" required="false" hidden="true" default="my/custom/dir/script.py" />
    <property name="iconLocation" required="false" hidden="true" default="my/custom/dir/icon.png" />
    <property name="taskColor" hidden="true" default="#9C00DB" />
    ...
scriptLocationspecifies a custom script location, that overrides the default rules explained in the previous paragraph.iconLocationis the location of an icon file (PNG or GIF format) that will be used in the UI for this task.taskColorallows you to define the color that will be used for the task in the UI, It is specified in HTML hexadecimal RGB format.
Packaging
The contents of the ext folder can be zipped into a single file with extension .jar (not .zip). The resulting jar file can be placed in the plugins directory. The XL Release server will also read custom tasks from this location, but only from jar files.
You can have multiple plugins and define contents in the ext folder at the same time. Note that the ext directory takes preference over the plugins directory.
A restart is required when changing the ext/synthetic.xml file or the contents of the plugins folder. You do not need to restart the server if you change the contents of a Python script.
When zipping, take care not to include the ext folder as part of the path. The synthetic.xml file should be in the root of the archive. On Unix systems, use these commands:
cd ext
zip -r ../myplugin.jar .
On Windows, use Windows explorer to compress the individual files in the ext folder.
